Recently, I found out about this neat little trick to bypass the storage limit on Zotero for PDFs. Currently on the "free" tier there is a limit of 300 MB which fills up pretty quickly when you're doing serious research. This guide helps bypass this limit (subject to your computer's storage).
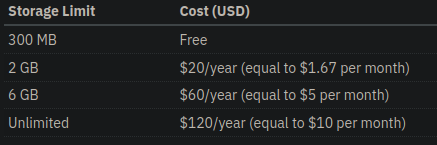
The prices are there for if you'd like to store associated PDFs on the cloud and makes sense if two or more people would like to share the same bibliography data. What this blogpost helps with is storing the files locally and syncing them peer-to-peer.
Best part is it's free!
Prior situation
Usually if you're employed at a university/research institution, the institute has a subscription to various journals. I would use this with Zotero, strictly only storing the metadata and journal links and opening them on the browser. The PDF can then be downloaded if you're on the institute's intranet.
Storage location for PDFs
On
Linux
this guide assumes you're using linux but i see no reason why it
cannot be adapted for windows and macos.
, by default I believe Zotero creates a directory ~/Zotero/ for storage of files, notes and metadata. I usually create my own custom location for the directory, ~/.zotero/ in this case as I don't like having my home directory
cluttered.
To actually keep your `~/` uncluttered, the best approach would be
something along the lines of `~/.local/share/zotero` which is
`XDG_DATA_HOME` according to XDG standards.
To change this, go to Edit -> Settings -> Advanced and under "Data Directory Location" you can specify a custom path.

Now assuming you already have a sizeable zotero database, we go to this location and are interested in the ~/.zotero/storage folder. This is where the PDFs are stored.
Changing a few settings
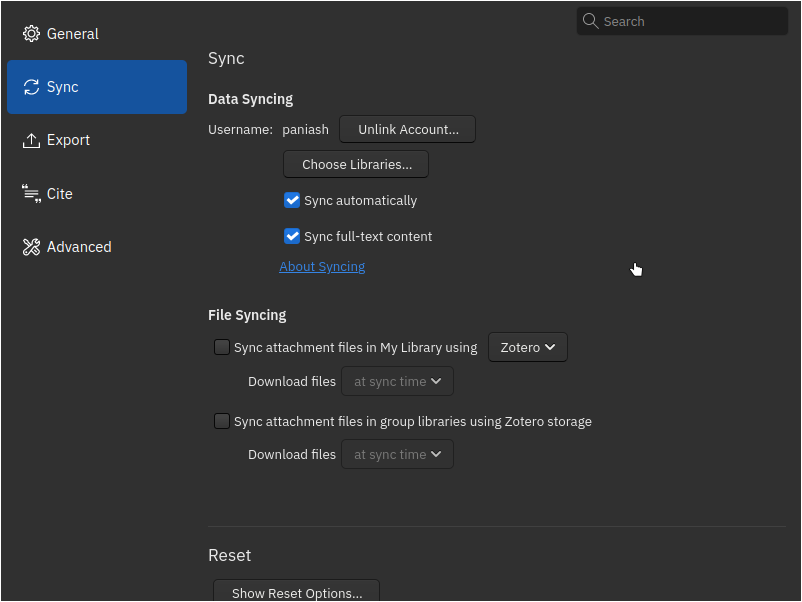
Now, by default Zotero syncs all your files to the cloud. We don't want that. To disable it, go to Edit -> Settings -> Sync and under File Syncing uncheck both "Sync attachment files in My Library" and "Sync attachment files in group libraries using Zotero storage".
Now that we have unchecked the boxes, one can simply save the PDFs as we like and use it on their computer. But what if we need to access files on a different computer? That's where peer-to-peer syncing comes in.
Syncing with Syncthing
Syncthing is an excellent piece of software. As described on their website:
Syncthing is a continuous file synchronization program.
Basically it helps sync files between different computers in a peer-to-peer fashion.
Quickstart guide
I would highly recommend the official user-guide for using syncthing. However, the following covers a quick and brief guide to getting syncing setup with Zotero.
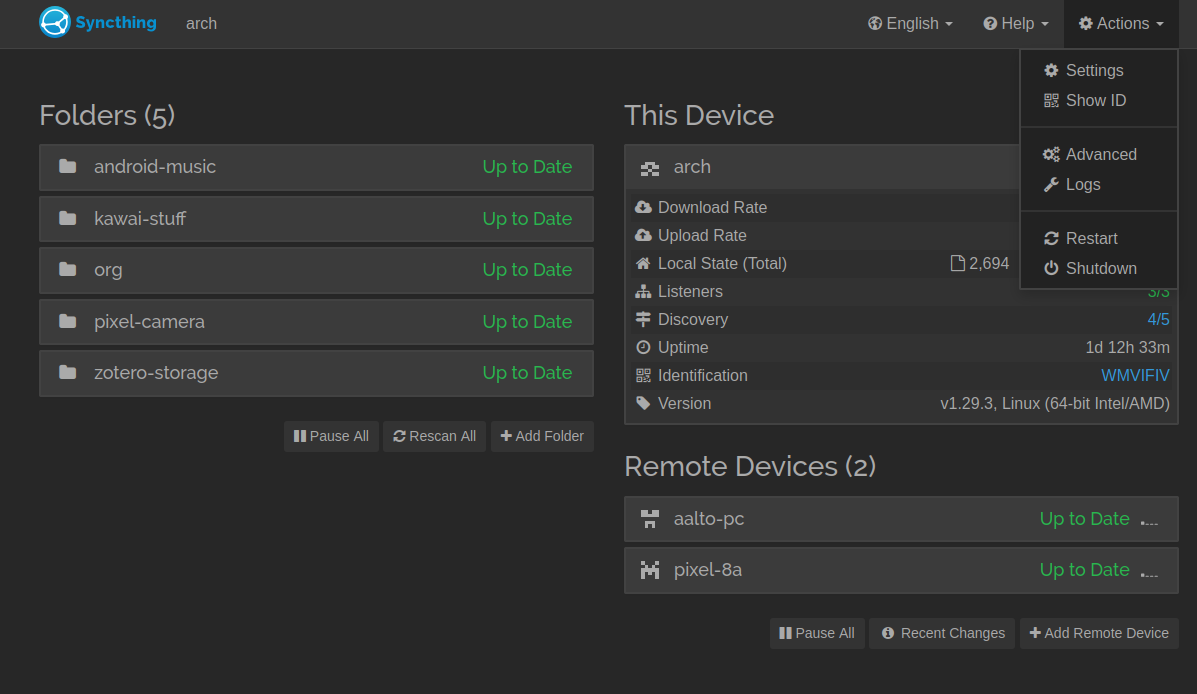
Launching syncthing in a terminal opens up localhost:8384 on your web browser and you're greeted with the GUI.
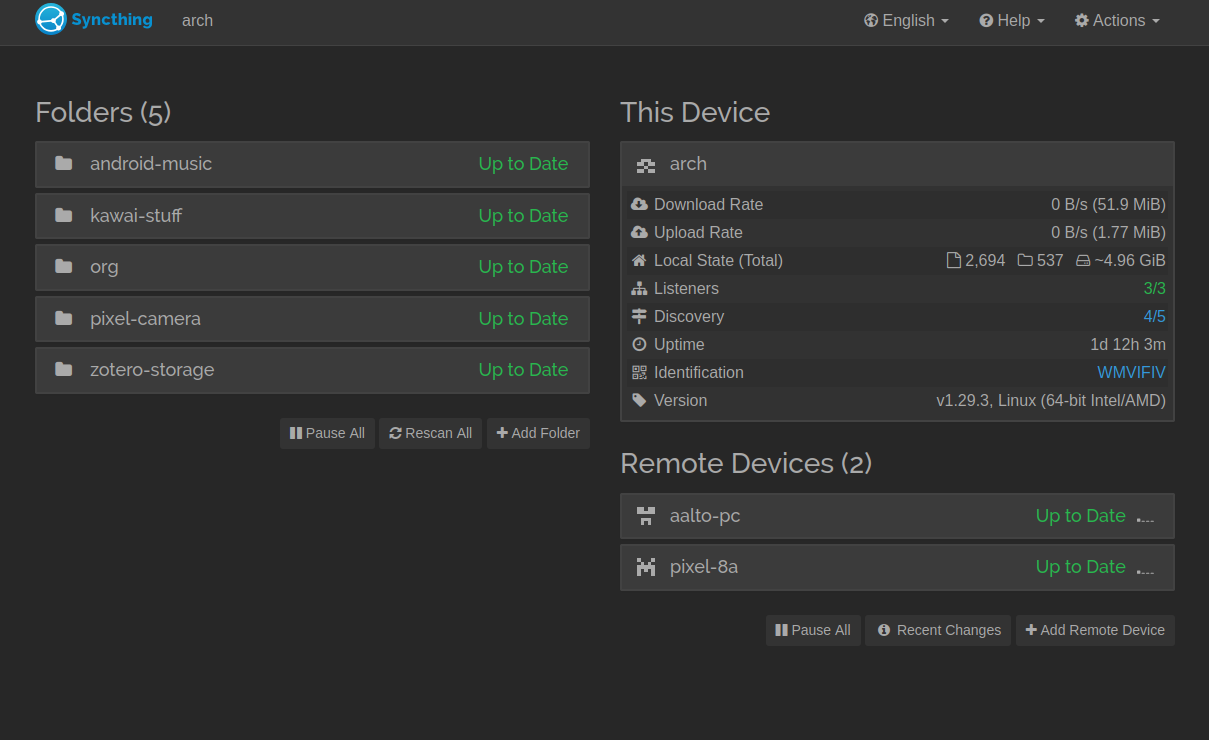
The GUI shows three components, two of which we are concerned with. On the left are the folders that are synced. The right bottom section consists of the devices to which certain folders are being synced. In my case, I have the zotero storage folder synced with my office PC and some other folders synced with my Android phone.
The "Add Folder" button is a good starting point. Clicking it leads us to a dialog box asking for a folder label and a folder path. The latter is important. For now, just ignore the folder ID variable. It is auto-generated by syncthing and is meant to let syncthing know which folders to sync across different computers based on this ID.
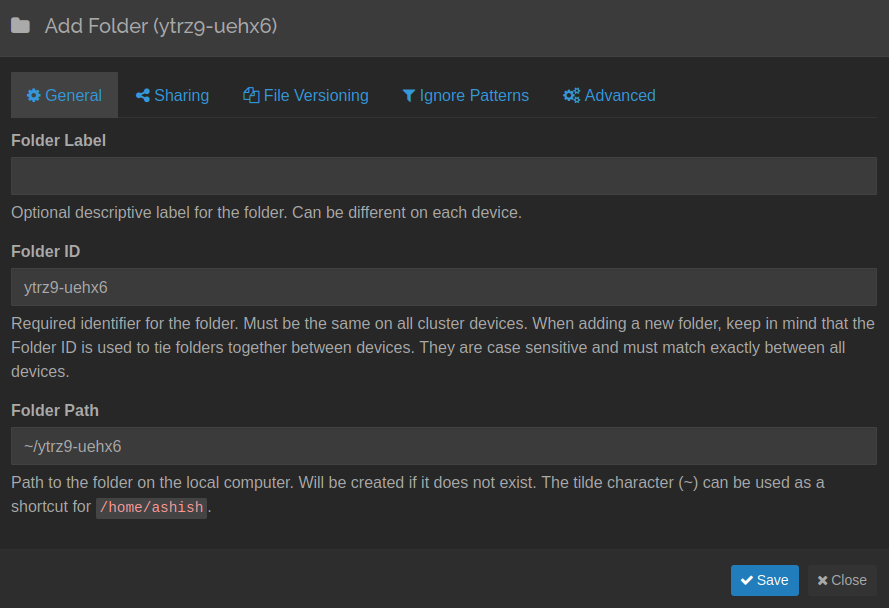
Now, just set the folder path to ~/.zotero/storage (or whatever is the custom folder path you've set in Zotero) and click save.
Adding remote device
On the secondary device that you'd like to access your PDFs on (laptop or perhaps a desktop at your office like me), then you need to launch syncthing on the remote device and add it on your main computer by clicking "Add Remote Device" at the bottom right corner in the GUI.
The device can be added either via a device ID or via a QR-code, which is accessible under the "Actions" tab and clicking "Show ID".
Follow similar instructions on the remote device for setting up a sync folder (should be empty as for the first sync, we're really transferring PDFs from the main device to the remote one). Make sure to have the same path in your Zotero settings on the remote device!
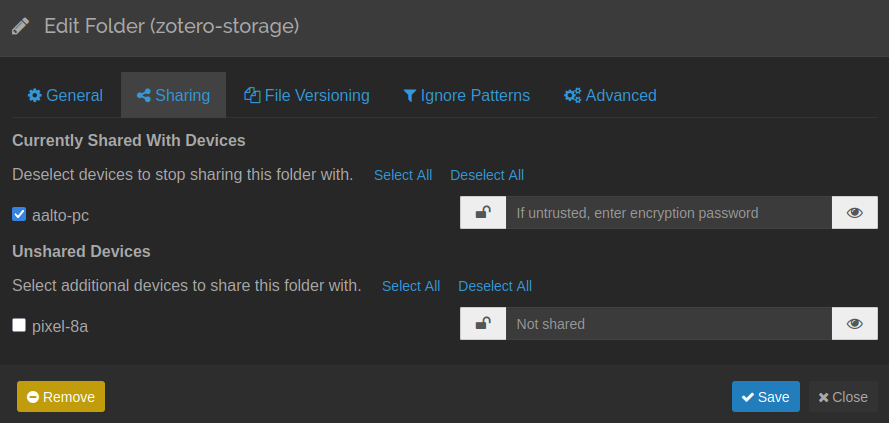
After adding the remote device, we need to share the folder we had set with the remote device. To do this, simply go to the zotero-storage folder under the "Folders" section and click edit. This will bring up a dialog box that we had previously edited. Under the "Sharing" tab, check the box for the added remote device. Don't worry about the "enter encryption password". You only need it if you're concerned with security and would like to have encrypted folders. I don't really care about that for zotero so I leave it unchecked. And just hit save.
If you have everything setup properly, the folder should get synced across both the devices and you should be able to access the PDFs in both these device! Of course, you can add more devices if you'd like.
I've been extremely happy with this setup and I hope it's useful to you as it has been for me, thanks to my friend Marci who introduced me to the idea.

Licensed under CC BY-NC-SA 4.0.
Source code under GPLv3 | Colophon.
Copyright (c) 2020- Ashish Panigrahi.
Part of Fediring; Visit the previous/next site.